I love sharing different creativity and art activities with you! I get a lot of questions about what particular supplies I’m using for some of the activities, so here they are.
General Supplies
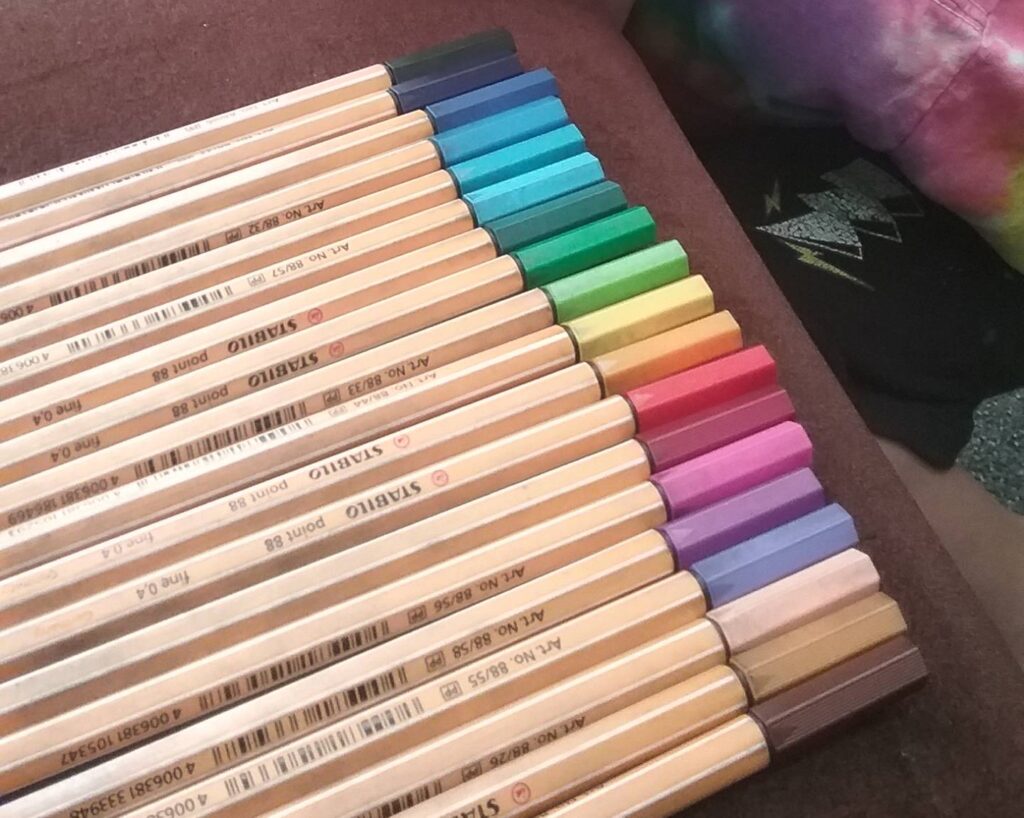
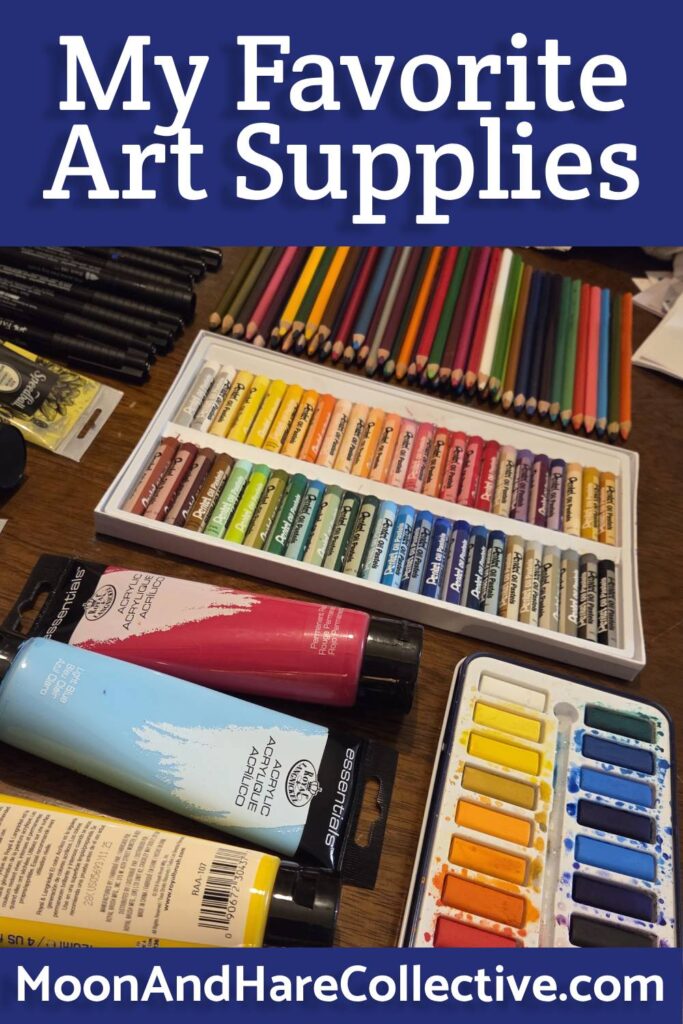
Colored pencils – I probably use colored pencils the most for drawing out design ideas for lino printing, and for pattern design. They travel well- I know people often travel with watercolors, but that seems too messy for me, so I prefer colored pencils. I like a 24 color set because it’s still fairly compact, but also has a good selection. Any set by Prismacolor is good, but I like the ones in tins– for travel of course! The Prismacolor scholar sets are a little less expensive and very good, but they don’t come in the tin.
My Commonplace Book – A commonplace book was traditionally a place to keep quotes or lists or anecdotes, or ideas or other things. Sounds very autistic and lovely to me. There might be a section in a large book for each of these things, or a separate book for each thing. Technically they’re not supposed to mix. But guess what!? It’s your book, you can do whatever you want. Mine is a watercolor journal that occasionally gets used for art, sometimes for journaling, often for quotes or a repository for little things I’ve collected from my life.
My sketchbook/practice book – I do keep a separate book for my art and design ideas. I go back through these books over and over when I’m ready to start on a new idea. There are drawings, sketches, sometimes painting, whatever I’m in the mood for. Again, I use a watercolor journal because the thick paper can handle anything I throw at it.
Oil Pastels – these are kind of new for me, but I know that Pentel is a good starter brand. I started with a set of 25, but I feel like you need a lot of colors for blending, so I upgraded to this set of 50 colors and I’ve been pretty happy with them.
Watercolor Painting
Lately I’ve been working with watercolors a lot. I find watercolors to be a really easy and accessible way to put color on the page. I’m definitely not a fancy watercolor artist, I just like to use them basically for coloring in my designs – and of course for my meditative art.
Watercolor pan set – this set is inexpensive and has really served me well for a long time. It’s not super fancy or anything, but it works great.

Kuretake Gansai Tambi watercolors are also a great – but more expensive choice. They are really lovely to use. They’re a little less transluscent than most other watercolors, but their big pans and fun box is fun to use, and the colors are great!
Waterproof Pens – You’ll see me using these a lot in my watercolor meditative art series. They are my favorite. They’re filled with India ink, which is just so nice. It’s waterproof, meaning you can use them before you paint. I’ve had various sets before, but I think my favorite is this set of 8 sizes because it has a couple marker style pens, as well as the micro sizes. I also love the big brush, especially with big acrylic paintings.
Embellishment Pens – I’ve found that Signo Uniball is the best brand of gel pens, and I mostly only use white and silver… and sometimes gold, so this is a great set.
Watercolor postcards – I like using postcards, especially for meditative art that is probably going to turn out nice no matter what, so I can send them as part of the Mail Art Movement. I really like these ones. Having postcards that already have lines on the backside is nice. But you can also purchase some 6×9 inch 140lb watercolor paper and cut them in half to create your own!
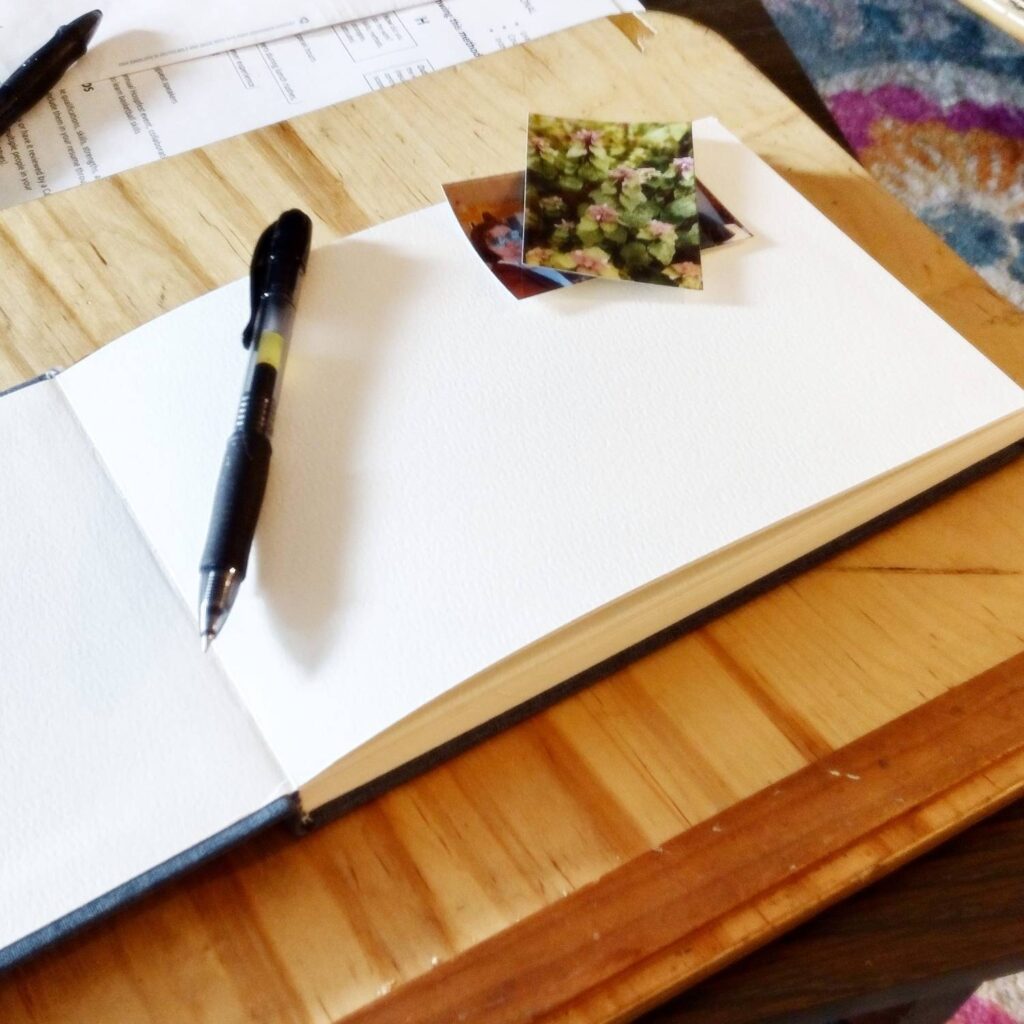
Watercolor journal – I have several watercolor journals. In fact, whenever I choose a journal of any type, I generally choose watercolor paper because the heavyweight paper will allow me to do pretty much anything I want to do with it. I use one from this set a my travel sketch book, and I also have one that stays in my bedroom for midnight drawings. I love square journals. So this 8 inch journal is my main art and personal journal. And this one is my practice sketchbook.
Block Printing
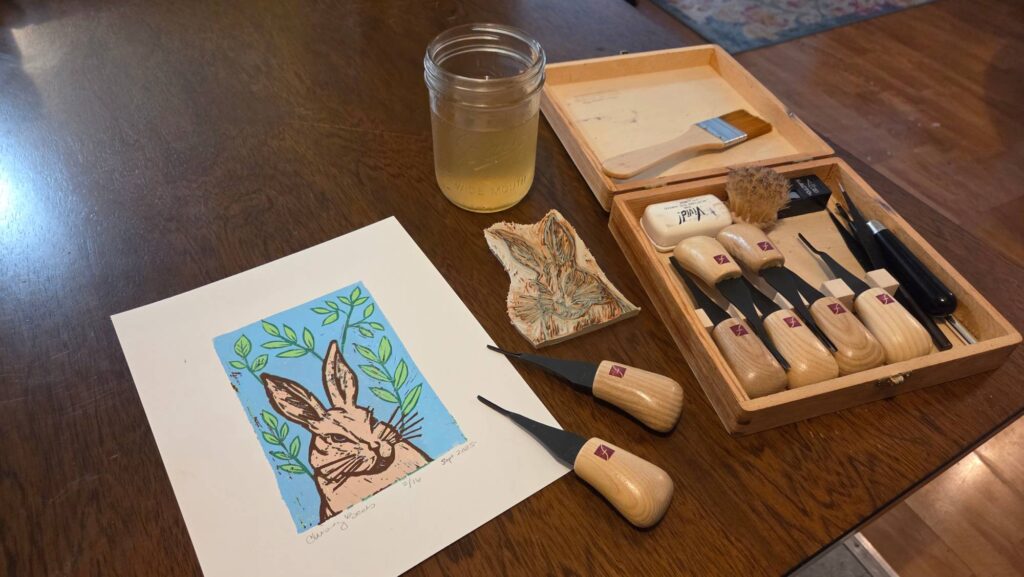
Of course, block printing has always been close to my heart. I started learning with a basic set of tools and branched out as I got more accomplished.
Basic Cutter Set – I started with a set like this Speedball set. It has a bunch of blades and you keep them inside the handle when you’re not using them, which is super handy! The blades don’t last forever though, which is a benefit of upgrading.
FlexCut Cutter Set – I’ve since upgraded to the Flexcut Mini and the Flexcut Micro cutter sets. They have a great selection. I use the V cutters from each set, and a U cutter from each set the most, but I use them all a lot and they’re great!
Slipstrop – If you use permanent blades, you need to debur, polish, and hone them. The Flexcut Slipstrop can be used with any brand of permanent bladed tools, and works really well. You might need to look up a YouTube video on how to use it at first – I know I did!!
Carving material – I’ve tried most of the different linos and rubber carving material out there, but I always come back to the Soft Kut Printing Block. it’s super easy to cut, and I think that it holds a lot of detail. I like it a lot. I buy the 12 x 18 pieces and cut it down to size.
Printing Paper – for papers, I really like the Richeson 88lb printing paper. It’s nice and heavy weight and holds up well for making reduction prints. I buy the 12×18 size and cut it to what I need. The 135lb paper also works really well for postcards.
Ink – My opinion might be in the minority here, but I really like the water soluble inks. Right now, my favorite is the Speedball brand. Water soluble inks dry fast and they’re super easy to clean up.
Brayer – I know there are other good brayers out there, but what I have are a bunch of the Speedball brayers, and honestly they’re quite good. I’m sure I’ll upgrade in the future!
Baren & Presses –
Platen – I would never use a glass cutting board in my kitchen, but it sure makes a great plate for rolling out ink! They’re easy to clean and hard to break. Just make sure yours has rubber feet on the bottom so it doesn’t slide all over the place.
Zine Making
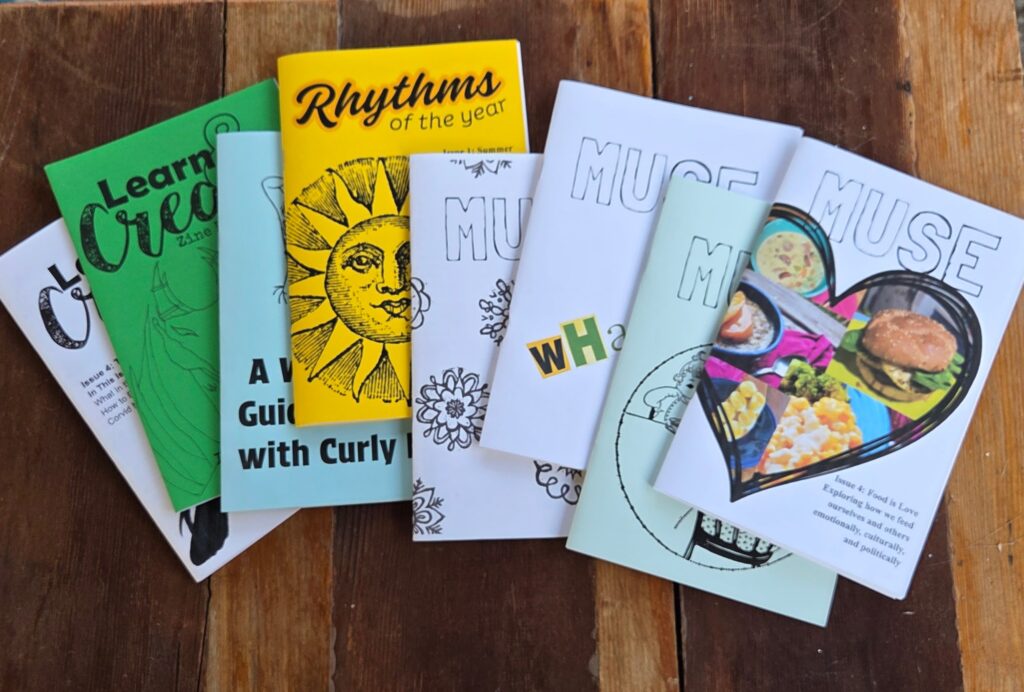
Software – First, I create the pages for my zines in Microsoft Word or Google Docs. Under Page Format, you can set the size. I create the pages in order and then save as a PDF. Then I put the PDF through this Zine Arranger. For this to work, the pages have to be in multiples of 8 – so 8, 16, 24, 32, etc… The Zine Arranger creates a final PDF with the pages in order for printing.
Printers – Printing is SO expensive! Taking your zine pages to the library is probably your cheapest option if you don’t have a printer. I finally invested in a printer, which is an expensive investment, but in the long run, it’s a lot cheaper. I got this Brother Monochrome Laser Printer and I’m super happy with it. My pages are always black and white, so that made sense for me. It does not print on cover stock, but it will print my mailing labels through the manual feed! For covers and color printing, I use this Epson Eco Tank. I haven’t had it very long, but I’m super happy with it. It easily prints on 65lb cover stock. Both printers print double-sided.
Paper – For paper, I just use basic 20lb printer paper. For coverstock, I use 65 pound cardstock in white or pretty much any other color. The colored cardstock in the scrapbooking section at craft stores is usually 65lb, so it’s easy to purchase it in smaller amounts.
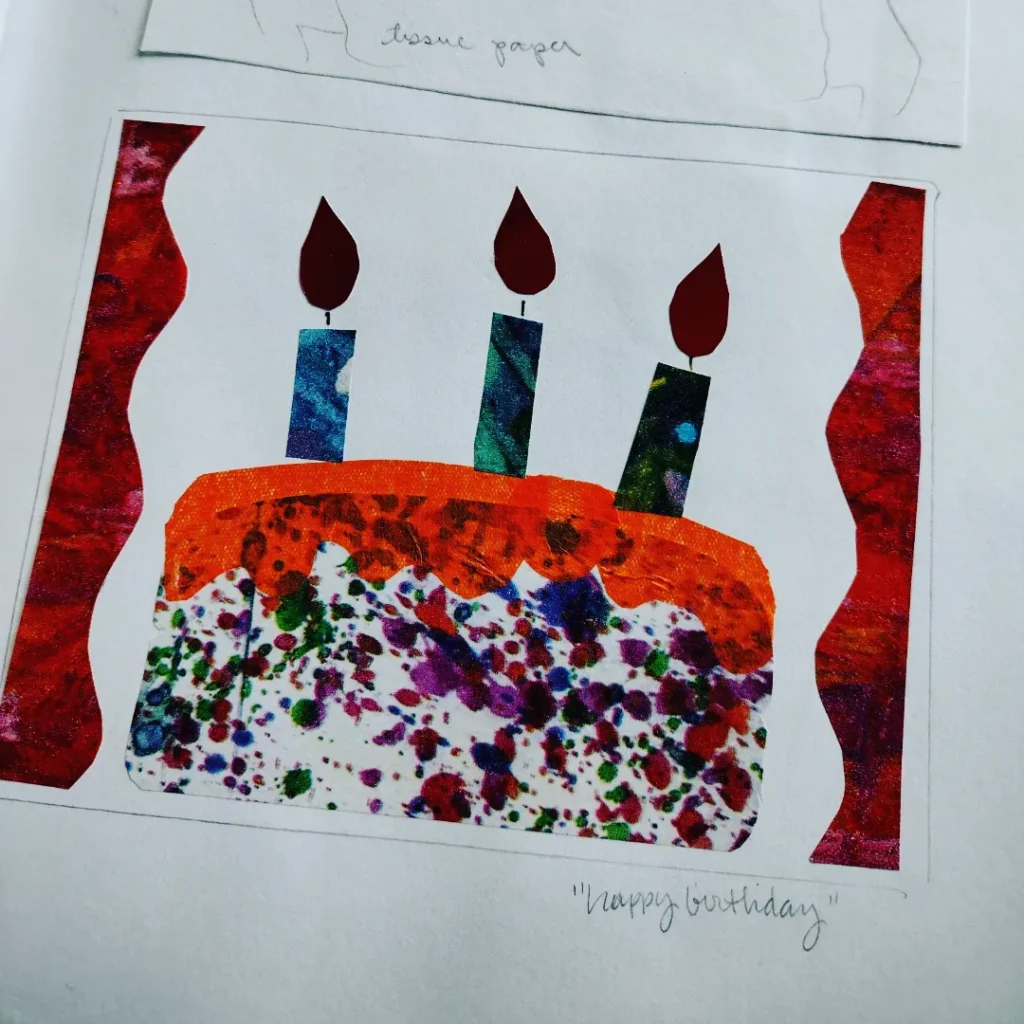
Collage
You might not know this, but collage was my first artsy love. When I first left home and went to college, I found this crafty book in the university book store and I was HOOKED!
Starter set – The book was called You Can Make a Collage by Eric Carle. It included instructions and a bunch of painted papers that he had created just for the book. It’s not in print anymore, but it looks like you can find some on ebay! I know I bought the book a couple times just for the papers, but in the long run it inspired me to learn how to create my own painted papers, and now I create them with acrylics, watercolors, ink, and gelli printing.
Mod Podge – Mod Podge Matte is my favorite for gluing collage pieces together. I like the smaller containers, and any type of flat brush works. Just choose a brush that’s the right size for your work.
Other Tools – For collage you’ll probably want some scissors. I have some basic Fiskars, and then a pair of smaller scissors, and an even tinier pair of embroidery scissors. Because you might just need teeny tiny scissors for teeny tiny pieces. A couple different sets of tweezers comes in handy too.
Substrates – Collage can be done on anything!! There are wood “canvases” that are fun to use, and then I like to use Bristol board for pictures that will be framed. But I’ll collage onto all sorts of things!
Collage Paper Storage – We also need something to store your painted papers in. I like short scrapbook paper boxes like these ones. This is also what I store my printing blocks in. But it’s easier to find the taller ones like this online and in local craft stores.
Embellishment Pens – I often embellish my collages with pen marks. I mostly use white and black, but I sometimes use silver and gold too. For black, I prefer Pitt Pens, which are India Ink. It’s such a nice bold ink. I like this set of 8 pens and sometimes the big brush pen too! No brand of gel pen really loves writing on painted papers, but for white, gold, and silver, I’ve found theSigno Uniball gel pens are the best and most consistent.
Gelli Printing
Gelli Plates – There are two good brands of gelli plates. Others may not give good or complete prints and may get hard over time. The good brands are Gelli Arts and Gel Press. My very favorite plate is the 12 x 14 size. I use the 5×7 size to create backgrounds for blockprints.
Paints – For paints, I like any kind of acrylic paints that come in a tube. While I learned with the little bottled acrylics, those have a really icky chalky feeling that I do not like at all. Liquitex or Golden are some of the really nice brands, but even the less expensive brands are nice for gelli printing.
Mark Making Tools – Mark making tools for gelli printing can really be anything – yarn or twine, leaves, lids from containers, anything really. Just make sure they’re not too sharp. However, there are also some tools you can purchase. Look into pottery tools or cake decorating tools. Paint scrapers or texture rollers. There are also so many designs of stencils, which can be used for fun effects.