I have tried all the different types of growing. In the ground, hugelkultur, raised beds – as long as it’s free or super cheap, I’ve tried it all. And I’ve found that different types of beds are better for different types of growing. For me, it makes sense to put annuals in a raised bed because these are easier to clear out at the end of the season. Because they’re easier to clear out, it’s also easier to contain the spread of any annuals as well. It’s obviously cheaper to use in-ground beds though. With my thick clay soil, it takes a lot of amendments, mulching, and topdressing with compost to make the soil anywhere near nice for planting! There’s also the matter of the grass that keeps trying to take over. So I do use in-ground beds – for my perennials. Plants that I can plant and not have to pay too much attention to after the first year – aside from the normal mulching and topdressing.
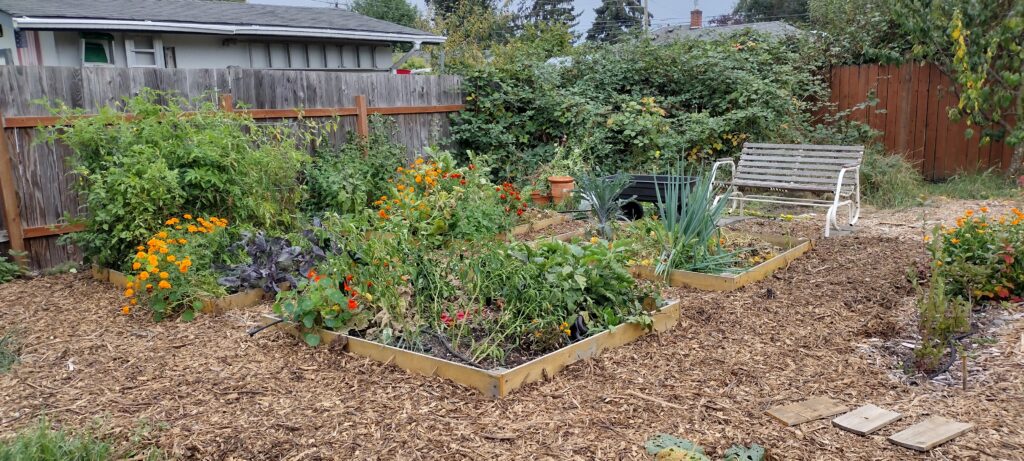
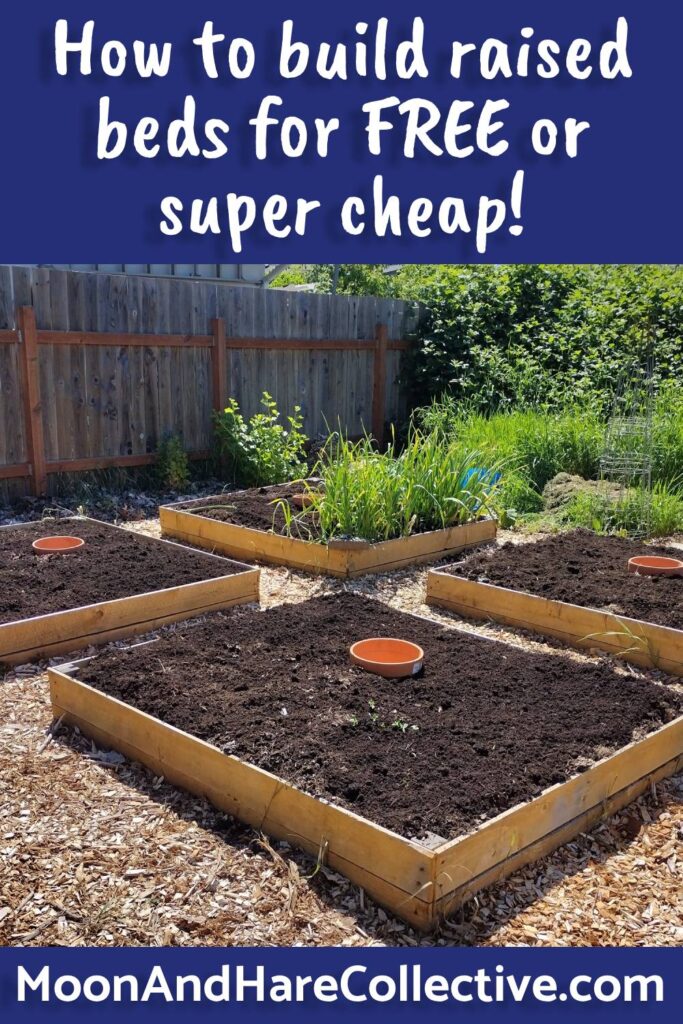
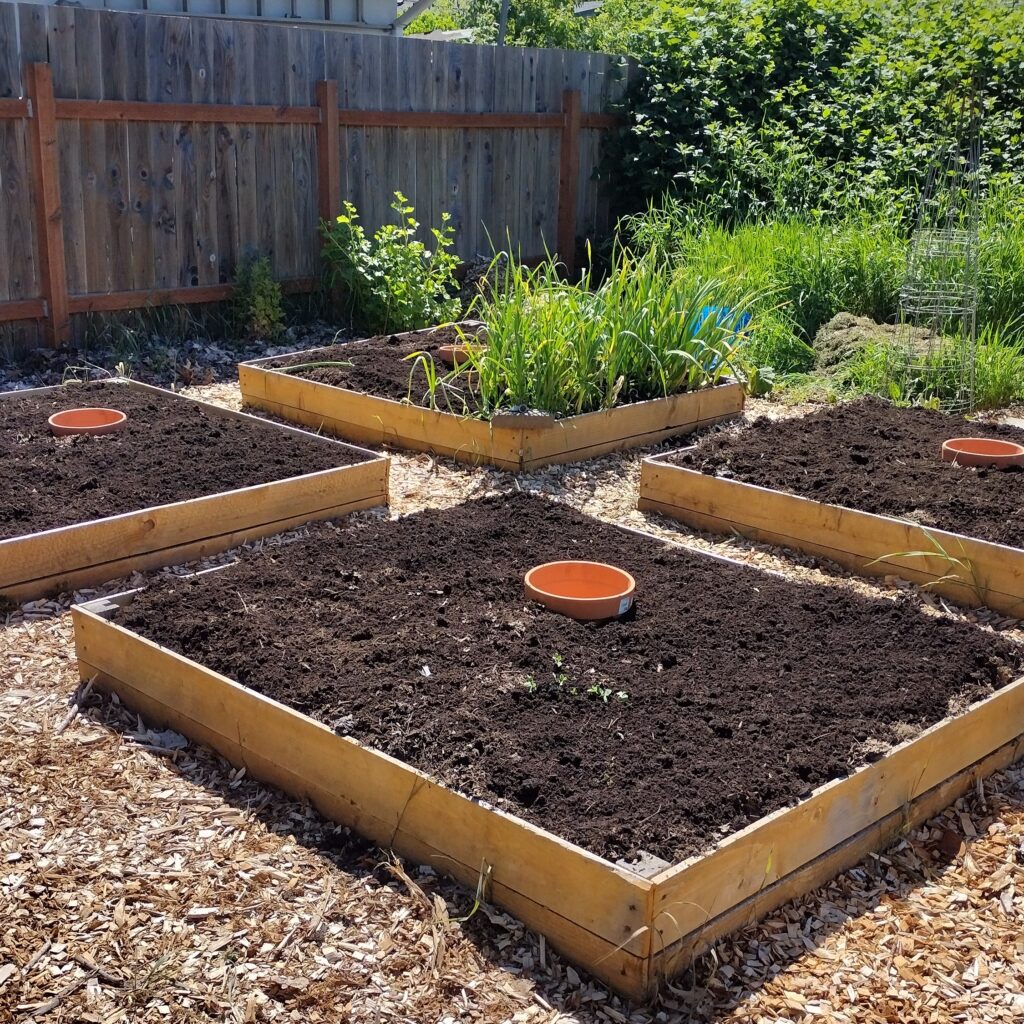
In the raised beds, my annuals are mainly vegetables, along with some pest-repelling flowers and herbs. I currently have 5 raised beds, with plans for 3 more. This should give me more than enough space to grow produce for my family for the year. In this guide, I’ll talk to you about why you might want to choose raised beds, and how to build and fill them for free or very cheap.
Why might you want to use raised beds?
Raised beds do have quite a few benefits over in ground beds. For one, depending on the height, you can make them more accessible. I’ve even seen ones that are counter height, allowing for people in wheelchairs to be able to access them.
Raised beds are also great if you’re renting. You can remove them or possibly even take them with you if you move.
You also have a lot more control over the soil quality. Even when I amend the soil in the ground, I have to keep doing it every year. It takes quite some time to make any difference at all. In areas with sandy soils, raised beds can help with water retention. In areas with clay soils, raised beds can be good for maintaining drainage though on the other side of that, they may get too dry. I recommend mulching, even with raised beds!
Raised beds can be easier for weed management too. Because you control the soil that goes into the beds, it will likely start out weed free. Having them a little higher up will make it easier to get at the weeds. Mulching is still a good idea to suppress weeds too though.
There are quite a few reasons to use raised beds. And there are a myriad of ways to create and fill your raised beds for cheap! Let’s dig in!
What to use as a raised bed?
There are a lot of options for creating raised beds. If you don’t have a lot of space, like on an apartment balcony, consider using pots or 5-gallon buckets to hold plants. Buckets can be bought pretty inexpensively at the hardware store, or potentially for free from delis and restaurants. Buckets generally have handles, so they’re fairly easy to transport if you move too. Pots can be found at the thrift store, or even the dollar store. I’ve seen people use pallets leaned upright against a wall with plants growing in between the slats. This would be especially good for strawberries. Of course there are also grow bags, some of which sit on the ground and some can hang up for growing.
If you’re able to build some raised beds, measure your space and choose sizes based on how big you want your garden to be. Make sure you leave enough space between them for walking. If you have grass surrounding your beds, I recommend leaving a walkway the width of your lawnmower. That will make it very easy to keep the grass tidy and short. Don’t overwhelm yourself by building too many raised beds. As with pretty much all homesteading and homemaking activities, start small and build as you learn what you can do and what your limits are.
A good size for raised beds is 2-3 feet wide by 4-5 feet long. You want to be able to reach across them comfortably. Raised beds should be somewhere between 6-12 inches tall. If they’re on the shorter end, make sure they’re placed over soil so the plants’ roots can grow into the ground if needed. If you can’t put them on the soil, then go for a deeper raised bed.
To build a simple raised bed for cheap or free, look for wood on Facebook marketplace, Craigslist, or your local Buy Nothing board on Facebook. Construction sites may have their leftovers available, or check out the Habitat ReStore if there’s one in your city. If you need to purchase new wood, check the back of the hardware store, they may have seconds available for half price or even less! You can also use pallets. Either remove the wood slats and build using those, or even just cut them in half and create a raised bed just the way they are. This guy on Facebook Reels used some pallets and added more wood on the outside of the beds.
Six foot tall fence pickets or 2x6s or 2x8s make great raised beds. To build a simple raised bed, cut the wood to the length you’d like and screw each end to a 2×4 or 4×4 cut to the right height. Then cut more wood to the width that you’d like and screw it to the 2x4s to create a corner. The 2×4 should be cut to the depth that you want the bed to be. All my beds are made from fence pickets, which are about 6 inches tall, and I use 2 of them. So my 2x4s are cut to just under 12 inches tall.
Other ideas for free and cheap raised bed materials are finding metal roofing – but make sure to fold the edges over, that stuff is sharp! Look for old troughs – these would make excellent beds. Cinderblocks or stacked bricks can be used as well.
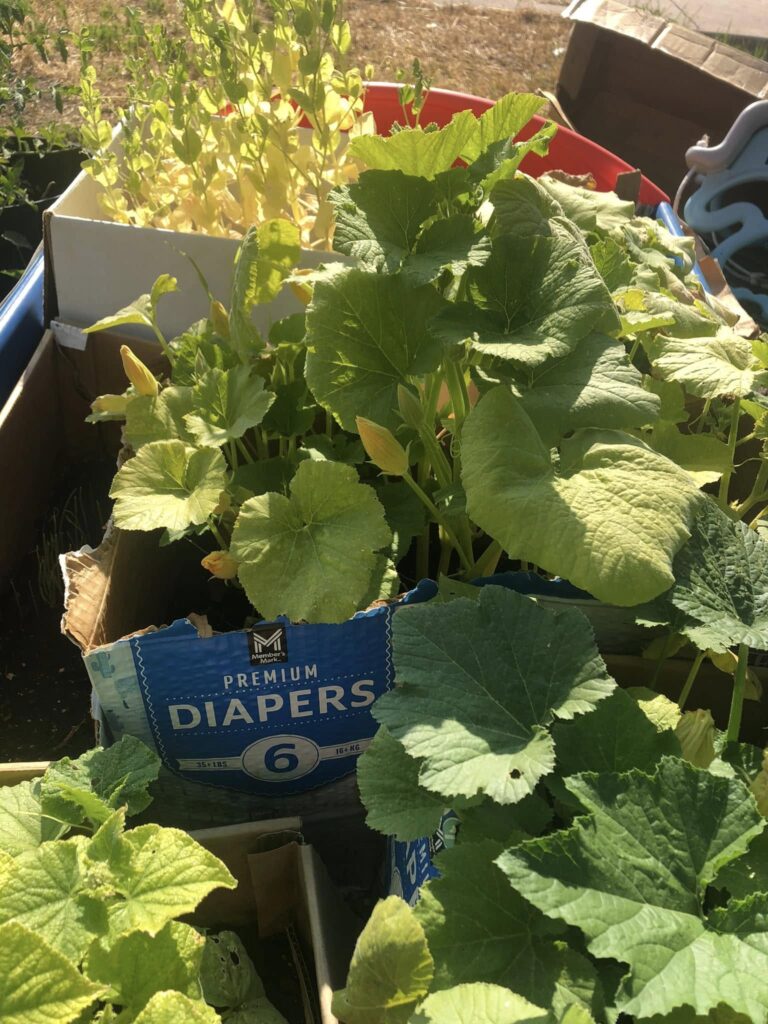
Don’t forget to try upcycling some materials. How about an old bathtub? I’ve seen people use toilets too. Milk crates would be great! Dresser drawers – or turn the empty dresser on its backside and use it. If there’s too much space between the slats or spaces in whatever you’re using, you can line the bed with some landscape fabric, burlap, or cardboard. Also don’t forget to take a look at estate sales: they often have great deals on raised beds, things that can be upcycled, and pots.
In a pinch, I’ve even seen someone use a few cardboard boxes, which got them through their first season of growing.
Note: There are some things to avoid when upcycling or recycling materials into raised beds. For instance, try to stay away from pressure treated wood and railroad ties, as they are full of toxins. Also make sure any paint that’s used isn’t lead based!
How to fill your raised beds?
Ok, you’ve got your raised bed all ready to go. Now, how to fill it without breaking the bank.
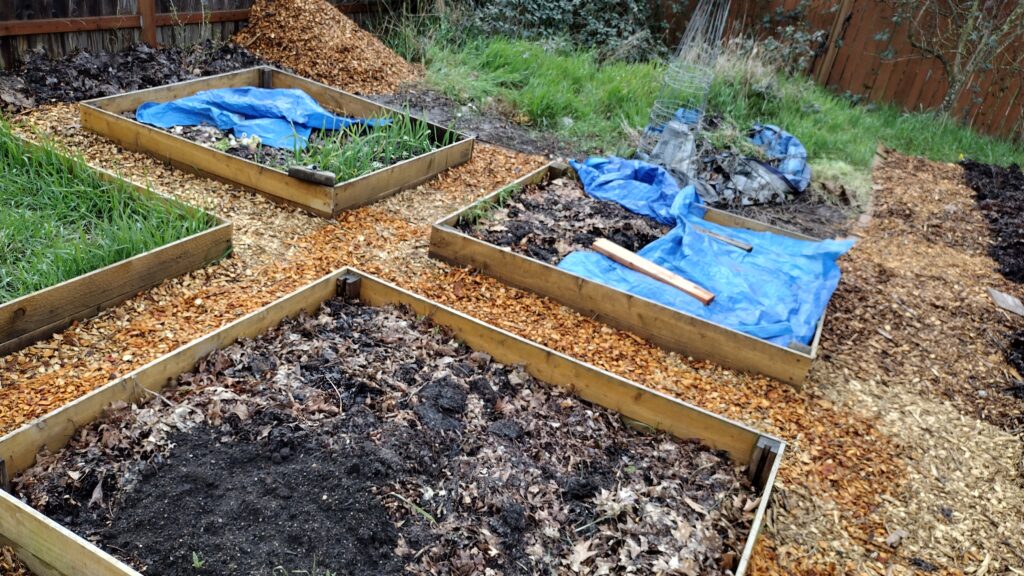
First, assess your location and make sure the bed will go in a bright, sunny area. Make sure the ground is level underneath. If your raised bed will be open on the bottom, like the fence picket bed I talked about before, put down cardboard wherever you want it to go. This will help smother the weeds underneath the bed.
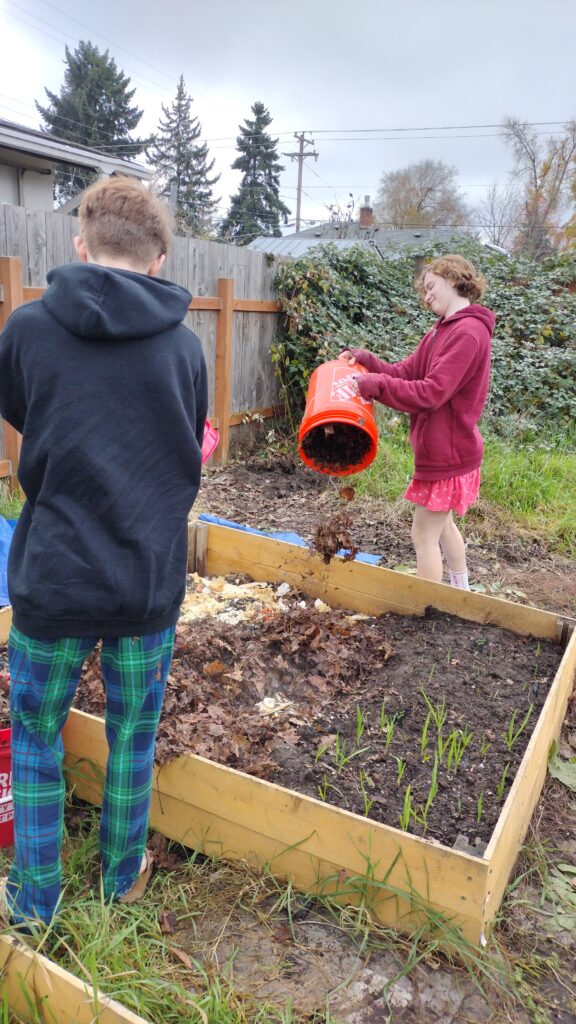
Start by filling your raised bed with logs, branches, and sticks. Fill it up about halfway with these things. After a big storm, or in the late winter and spring, there are often fallen trees that get cut up and left for firewood. Make sure to get permission if you need it, but these make excellent bulky filler for raised beds.
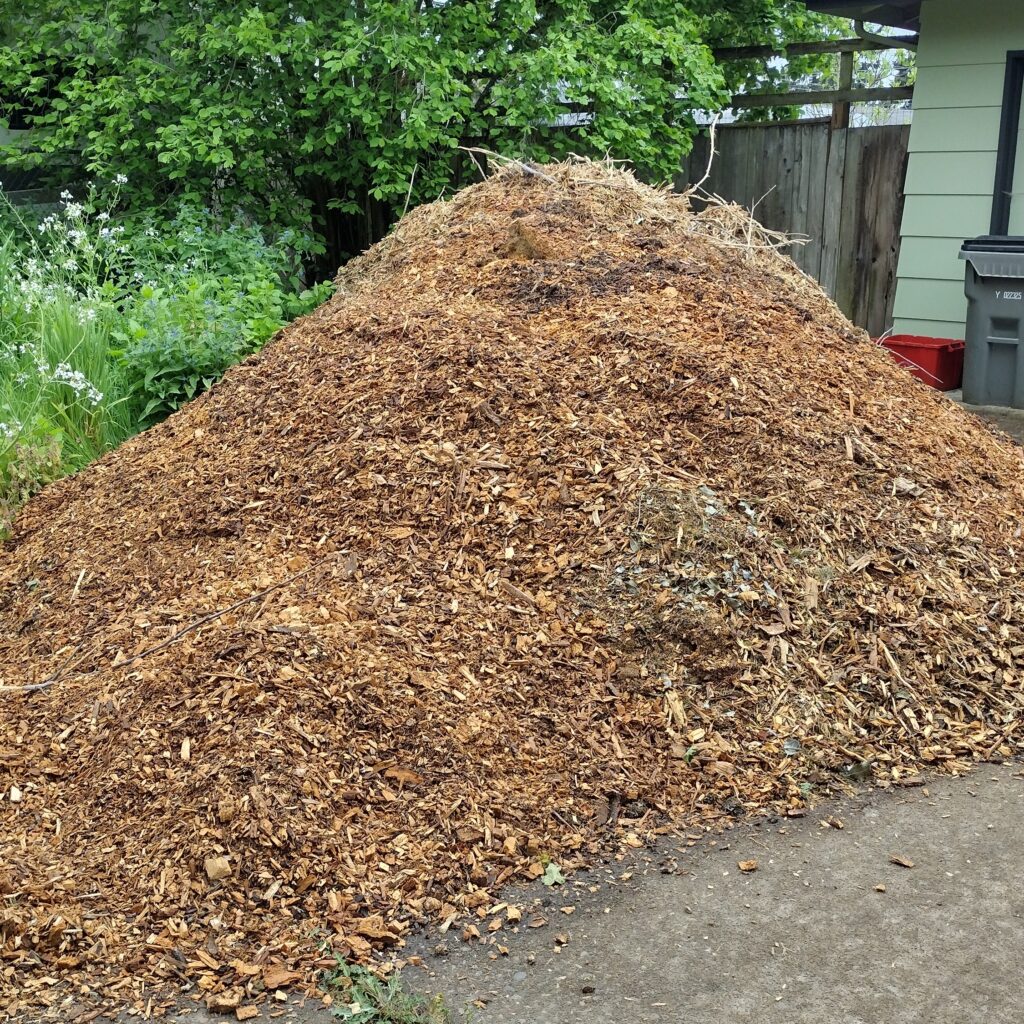
Next, you’ll want to add scrappy pieces that are smaller. Fill in around the logs and sticks with wood chips, leaves, grass clippings, straw, coffee grounds. You can basically compost right into the bed by putting a thin layer of food scraps from your kitchen, followed by a thicker layer of wood chips, leaves and straw.
You can get wood chips by registering with ChipDrop.com and having them delivered for free. It may take some time, but it’s totally worth it. You can also get logs and branches mixed in the load. You might also have a municipal wood chip pile in your city that you can go get them for yourself. Between a huge city pile and ChipDrop, that is how I got all the wood chips that make up the paths between my raised beds and around my garden.
I filled my raised beds up slowly by adding layers of food scraps from my kitchen (don’t add meat, that will attract rats), plus coffee grounds when I could get them. And then leaves from the municipal leaf pile. This has helped create some really healthy raised beds. Unfortunately, once I got a dog, I wasn’t about to do that anymore, as he likes to dig in the beds. Maybe one day he’ll learn!
If you don’t have time to do the layering method, that’s ok. You can just fill the beds up with leaves. Now this isn’t the healthiest solution, but it’s a good start. Try to plant some beans and peas in each bed to help fix nitrogen in the soil as the leaves break down. You may need to use extra compost as fertilizer during the first year. And then during the off season, plant nitrogen-fixing cover crops like clovers, buckwheat, and legumes for really healthy beds the next year.
If you have a city leaf pile, that’s a great way to fill your beds for free. Some cities have a free leaf delivery. Be careful though- they’re usually whole dump truck loads, which is way more than you might think it is!

Finally, you’ll want to top off the raised beds with 2-3 inches of soil and/or compost. If you’re making your own compost, that’s great, you’re ready to go. Otherwise, look for free sources around your town. Ask your neighbors or friends for the spent potting soil from previous years. Check with your local composting organizations or see if you have a municipal mulch or compost site.
In the spring time, as people getting their gardens ready for the year, many people order loads of compost, soil, wood chips, and other garden goodies, miscalculating how much they need. Keep your eyes peeled on Craigslist, Facebook Marketplace, Buy Nothing Groups, and local gardening groups for people giving these things away for free! In the gardening groups, you’ll also likely find free plants being given away in the springtime. This is how I filled my garden for free! Just remember rule #8 of getting stuff for free: return the service to your community!
You don’t have to spend hundreds of dollars to create a garden!
I find that the free and cheap gardening goodies are almost more rewarding than if I were to just order from a garden center. I like the hodge podge look of things that I gathered from a variety of sources. And the more you look for free things, the more you’ll find.
I think that I’ve probably spent less than $100 on the infrastructure for my garden. I’ve also found other things like fencing, decorations, and even a rocking bench for super cheap or free. When it comes down to it, just learn to embrace imperfections because guess what… plants don’t care if it’s rustic or used. They just want water and sun, and a little compost. Ok, what is the wildest thing that you have created a raised bed from? Let me know in the comments below!